In order to write and compile a Java programs, applets or servlets one must download the Java Development Kit (JDK) which provides a compiler, class libraries and tools to compile and run Java code. In this tutorial we will use the Oracle/Sun JDK but I'm sure any will do. See YoLinux Java for a list of available JDK's for Linux. Linux also ships with OpenJDK which will also work with Tomcat.
One must choose complimentary versions of Tomcat and Java as they must match appropriately:
| Apache Tomcat Version | Servlet Spec | JSP Spec | EL Spec | Websocket Spec | JASPIC Spec | Supported Java Versions |
|---|---|---|---|---|---|---|
| 9 | 4.0 | 2.3 | 3.0 | 1.1 | 1.1 | 8+ |
| 8 | 3.1 | 2.3 | 3.0 | 1.1 | 1.1 (Tomcat 8.5) | 7+ |
| 7 | 3.0 | 2.2 | 2.2 | 1.1 | N/A | 6+ (7+ for WebSocket support) |
| 6 | 2.5 | 2.1 | 2.1 | N/A | N/A | 5+ |
- EL is the "Unified Expression Language" used for embedding expressions into JSP web pages and based on JSTL to employ XML based scripting.
- JASPIC provides an interface to authentication implementations with Tomcat
- Java Standard Edition (SE) JDK - Main page download and info
Note:
- The Java Runtime Environment (JRE) will be adequate to configure the server environment but the Software Development Kit (SDK) is required if one wants to write and compile Java programs. The Java SDK is available in RPM and tar format.
- Tomcat version require compatible Java versions. Thus use Java version 1.8 or 1.7 for use with Tomcat version 8, use Java 1.7 for use with Tomcat 7 and Java 1.6 for use with Tomcat 6.
Download: RHEL:
- Java JDK 1.8: jdk-8u77-linux-x64.rpm (Red Hat, Fedora, CentOS or Suse systems) or jdk-8u77-linux-x64.tar.gz (all other versions of Linux).
- Java JDK 1.7: jdk-7u40-linux-x64.rpm
RHEL Install: rpm -ivh jdk-8u77-linux-x64.rpm
SDK installed in /usr/java/latest/.
Configuration:
Set the environment variable PATH. Add statement to $HOME/.bash_profile or $HOME/.bashrc or shell script which controls the environment.
#!/bin/bash
if [ -d /usr/java/latest ]
then
    export PATH=/usr/java/latest/bin:$PATH
    export JAVA_HOME=/usr/java/latest
    export CLASSPATH=/usr/java/latest/lib/tools.jar:/usr/java/latest/jre/lib/rt.jar
    export MANPATH=$JAVA_HOME/man:/opt/man:$MANPATH
fi
The shell script may be re-executed with the command: . .bashrc
Test:
Use the following test program: Test.java
public class Test
{
   public static void main(String[] args)
   {
      System.out.println("Hello world");
   }
}
Compile: javac Test.java
Note that the file name and the class name must be the same. The result of the compile is the file: Test.class
Run:
[prompt]$ java Test
Hello world
OpenJDK can be installed using package management:
- RHEL/CentOS/Fedora:
- Java 1.7: yum install java-1.7.0-openjdk java-1.7.0-openjdk-devel java-1.7.0-openjdk-javadoc alternatives
- Java 1.6: yum install java-1.6.0-openjdk java-1.6.0-openjdk-devel java-1.6.0-openjdk-javadoc alternatives
(Note: JAVA_HOME=/usr/lib/jvm/java-1.6.0-openjdk-1.6.0.0/)
- Ubuntu: (Ubuntu 12.4: add repository: add-apt-repository ppa:openjdk-r/ppa, not required for 16.04+)
- Java 1.9: apt-get install openjdk-9-jdk
- Java 1.8: apt-get install openjdk-8-jdk
- Java 1.7: apt-get install openjdk-7-jdk
- Java 1.6: apt-get install openjdk-6-jdk
(Note: JAVA_HOME=/usr/lib/jvm/java-7-openjdk/)
Links:
- Oracle 1.9 install doc: Java installation instructions
- Oracle 1.9 docs:Java Documentation
- Oracle 1.8 install doc: Java installation instructions
- Oracle 1.8 docs:Java Documentation
- Oracle 1.7 install doc: Java installation instructions
- Oracle 1.7 docs:Java Documentation
Tomcat is the Java "container" or processor for Java Servlets and Java Server Pages (JSP). Note also that Java must be installed in order for Tomcat to operate. (See previous section above) This tutorial will focus on the use of Tomcat with Apache but it should be noted that the default Tomcat installation enables Tomcat to be a stand-alone http web server and servlet container.
Tomcat can be directly downloaded from the Apache Tomcat website or installed by the package manager from the package repository. By default RHEL6 comes with Tomcat 6.0.
Apache Tomcat Java Servlet and JSP container home page
Tomcat 9 requires Java 1.8. Tomcat 8 requires Java 1.7 or 1.8 JDK installation. Tomcat 8 will NOT run with Java version 1.6!
Ubuntu 18.04 users have the option of installing using the package manager: sudo apt-get install tomcat9
Ubuntu 16.06 users have the option of installing using the package manager: sudo apt-get install tomcat8
All versions of Linux can install using the tar file available from the Apache Tomcat website.
Download: apache-tomcat-8.0.0-RC1.tar.gz
Install:
- cd /opt
- tar xzf ~/Downloads/apache-tomcat-8.0.0-RC1.tar.gz
(Result: /opt/apache-tomcat-8.0.0-RC1/)
Stop: /opt/apache-tomcat-8.0.30/bin/shutdown.sh
Build jsvc: Jsvc allows the application (e.g. Tomcat) to perform some privileged operations as root (e.g. bind to a port < 1024), and then switch identity to a non-privileged user.Build jsvc daemon project (C source) - included with tomcat binary distribution
- cd /opt/apache-tomcat-8.0.0-RC1/bin
- tar xzf commons-daemon-native.tar.gz
- cd commons-daemon-1.0.15-native-src/unix
- ./configure --with-java=/usr/java/latest
- make
- cp jsvc ../..
- cd ../..
#!/bin/bash
if [ -d /usr/java/latest ]
then
  export PATH=/usr/java/latest/bin:$PATH
  export JAVA_HOME=/usr/java/latest
  export CLASSPATH=/usr/java/latest/lib/tools.jar:./
  export MANPATH=$JAVA_HOME/man:/opt/man:$MANPATH
fi

export CATALINA_HOME=/opt/apache-tomcat-8.0.0-RC1/
    CATALINA_BASE=$CATALINA_HOME
    cd $CATALINA_HOME
    ./bin/jsvc \
        -classpath $CATALINA_HOME/bin/bootstrap.jar:$CATALINA_HOME/bin/tomcat-juli.jar \
        -outfile $CATALINA_BASE/logs/catalina.out \
        -errfile $CATALINA_BASE/logs/catalina.err \
        -Dcatalina.home=$CATALINA_HOME \
        -Dcatalina.base=$CATALINA_BASE \
        -Djava.util.logging.manager=org.apache.juli.ClassLoaderLogManager \
        -Djava.util.logging.config.file=$CATALINA_BASE/conf/logging.properties \
        org.apache.catalina.startup.Bootstrap
Make the script executable: chmod +x /opt/bin/tomcat8start.sh
Example start:
[root@hostname apache-tomcat-8.0.0-RC1]# /opt/bin/tomcat8start.sh
Using CATALINA_BASE:   /opt/apache-tomcat-8.0.0-RC1/
Using CATALINA_HOME:   /opt/apache-tomcat-8.0.0-RC1/
Using CATALINA_TMPDIR: /opt/apache-tomcat-8.0.0-RC1//temp
Using JRE_HOME:        /usr/java/latest
Using CLASSPATH:
/opt/apache-tomcat-8.0.0-RC1//bin/bootstrap.jar:/opt/apache-tomcat-8.0.0-RC1//bin/tomcat-juli.jar
See all jsvc daemon options with "jsvc --help"
Pitfall: If you get a ClassNotFoundException or a NoClassDefFoundError for a Commons-Daemon class, add the Commons-Daemon JAR to your classpath or use -cp argument when launching jsvc.
Run:
Place WAR file applications in /opt/apache-tomcat-8.0.0-RC1/webapps/ and access via the URL http://localhost:8080/
Try the example applications in /opt/apache-tomcat-8.0.0-RC1/webapps/examples/ and access via the URL http://localhost:8080/examples/
If executing a single Java class file like the HelloWorld example below, place in the directory /opt/apache-tomcat-8.0.0-RC1/webapps/ROOT/WEB-INF/classes/ and access via the URL http://localhost:8080/HelloWorld
Tomcat Configuration:
File: /opt/apache-tomcat-8.0.0-RC1/conf/tomcat-users.xml<tomcat-users> <role rolename="tomcat"/> <role rolename="role1"/> <user username="tomcat" password="tomcat" roles="tomcat"/> <user username="both" password="tomcat" roles="tomcat,role1"/> <user username="role1" password="tomcat" roles="role1"/> </tomcat-users>
This installation uses Tomcat RPM packages furnished with RHEL6.
Install:- tomcat6-6.0.24-45.el6.noarch
- tomcat6-lib-6.0.24-45.el6.noarch
- tomcat6-el-2.1-api-6.0.24-45.el6.noarch
- tomcat6-servlet-2.5-api-6.0.24-45.el6.noarch
- tomcat6-jsp-2.1-api-6.0.24-45.el6.noarch
- apache-tomcat-apis-0.1-1.el6.noarch
- jakarta-commons-pool-tomcat5-1.3-12.7.el6.x86_64
- jakarta-commons-dbcp-tomcat5-1.2.1-13.8.el6.noarch
Documentation:
- Tomcat 6.0 Documentation
- Also look at local documentation: /usr/share/doc/tomcat6-6.0.24/ for release notes.
- Local app documentation files: /var/tomcat6/webapps/tomcat-docs/
Config files:
| File | Description |
|---|---|
| /etc/sysconfig/tomcat6 | System configuration and file paths. Uncomment environment variable definitions |
| /etc/tomcat6/catalina.policy | Java security permissions and access: JDBC, sockets |
| /etc/tomcat6/catalina.properties | Java packages and settings |
| /etc/tomcat6/context.xml | reference to WEB-INF/web.xml as a monitored resource |
| /etc/tomcat6/log4j.properties | log4j debug levels and log file ref |
| /etc/tomcat6/logging.properties | log file settings and log levels |
| /etc/tomcat6/server.xml | Servlet container configuration: server properties, port numbers for services, DB connectors (MySQL, PostgreSQL, Oracle, ODBC, etc):
8080 - http (redirect 8443) 8009 - AJP/1.3 (redirect 8443) 8005 - shutdown |
| /etc/tomcat6/tomcat6.conf | prime config file: self aware directories, user id, .. |
| /etc/tomcat6/tomcat-users.xml | Tomcat web management console: login/passwords, roles
<?xml version='1.0' encoding='utf-8'?>
 <tomcat-users>
 <role rolename="manager"/>
 <user name="tomcat" password="supersecret" roles="manager" />
 </tomcat-users>
|
| /etc/tomcat6/web.xml | Web apps, servlets, jsp, server mime types |
- cd /var/lib/tomcat6/webapps/
- mkdir -p WEB-INF/classes
- mkdir WEB-INF/lib
Start service: service tomcat6 start (or: /etc/init.d/tomcat6 start)
Notes:
- Tomcat will execute as user tomcat
- To add to init boot process: /sbin/chkconfig --add tomcat6
- Tomcat Log files: /var/tomcat6/logs/
- JAR files and JDBC drivers: /var/tomcat6/webapps/examples/WEB-INF/lib/
Tomcat Manager:
<tomcat-users>
<user name="tomcat" password="tomcat" roles="tomcat" />
<user name="role1"  password="tomcat" roles="role1"  />
<user name="both"   password="tomcat" roles="tomcat,role1" />
<user name="admin1" password="supersecret" roles="standard,manager,tomcat,role1" />   <!-- Added this line with "manager role" -->
<user name="admin2" password="supersecret2" roles="admin,manager,provider" />
</tomcat-users>
Use URL to list web applications: http://localhost:8080/manager/list
Documentation: http://localhost:8080/tomcat-docs/manager-howto.html - [Web]
Hello World Tomcat servlet example WAR file:
Directory set-up:
- mkdir -p src/main/java/com/megacorp/projectx
- mkdir -p src/main/webapp/WEB-INF
File: src/main/java/com/megacorp/projectx/HelloWorld.java
package com.megacorp.projectx;

import java.io.*;
import java.text.*;
import java.util.*;
import javax.servlet.*;
import javax.servlet.http.*;

public class HelloWorld extends HttpServlet {

    public void doGet(HttpServletRequest request,
                      HttpServletResponse response)
    throws IOException, ServletException
    {
        response.setContentType("text/html");
        PrintWriter out = response.getWriter();
        out.println("<html>");
        out.println("<head>");
        out.println("<title>Hello World!</title>");
        out.println("</head>");
        out.println("<body>");
        out.println("<h1>Hello World!</h1>");
        out.println("</body>");
        out.println("</html>");
    }
}
Compile:
[prompt]$ javac -cp /opt/apache-tomcat-8.0.30/lib/servlet-api.jar HelloWorld.javaThis generates HelloWorld.class
Relocate class file to:
- RHEL6: /var/lib/tomcat6/webapps/examples/WEB-INF/classes/com/megacorp/projectx/HelloWorld.class
- Tomcat 8: /opt/apache-tomcat-8.0.30/webapps/examples/WEB-INF/classes/com/megacorp/projectx/HelloWorld.class
Servlet Configuration file web.xml:
- RHEL6: /var/lib/tomcat6/webapps/examples/WEB-INF/web.xml
- Tomcat 8: /opt/apache-tomcat-8.0.30/webapps/examples/WEB-INF/web.xml
<?xml version="1.0" encoding="UTF-8"?>
<web-app xmlns="http://xmlns.jcp.org/xml/ns/javaee"
         xmlns:xsi="http://www.w3.org/2001/XMLSchema-instance"
         xsi:schemaLocation="http://xmlns.jcp.org/xml/ns/javaee
                             http://xmlns.jcp.org/xml/ns/javaee/web-app_3_1.xsd"
         version="3.1"
         metadata-complete="true">

    <description>Hello World</description>
    <display-name>Hello World</display-name>

    <servlet>
        <servlet-name>HelloWorld</servlet-name>
        <servlet-class>com.megacorp.projectx.HelloWorld</servlet-class>
    </servlet>

    <servlet-mapping>
        <servlet-name>HelloWorld</servlet-name>
        <url-pattern>/HelloWorld</url-pattern>
    </servlet-mapping>
</web-app>
Note:
- Java class com.mycompany.mypackage.MyServlet would be stored in /WEB-INF/classes/com/mycompany/mypackage/MyServlet.class
- Libraries (JAR files, JDBC drivers, etc) held in /WEB-INF/lib/ if one follows standard configuration.
Tomcat Test: http://localhost:8080/examples/servlets/servlet/HelloWorld
Don't expect a lot. It just generates a web page dynamically which
states "Hello World".
Note:
- The mapping of path /var/tomcat6/webapps/examples/WEB-INF/classes/ to the URL /examples/servlet/ is defined in /var/tomcat6/conf/web.xml. Look for the XML tag "<servlet-mapping>".
- Many examples with source code are included with Tomcat. See: http://localhost:8080/examples/servlets/index.html
Typically Java web applications are deployed as a single deployable file known as a "WAR" file (Web ARchive). Java web applications typically are comprised of multiple servlet classes, HTML and JSP pages with accompanying images and libraries. All of these can be deployed as a single Java WAR file. We will use Apache ANT and Apache Maven to build and deploy a WAR file for the HelloWorld servlet web application.
The following directory structure will be used to buld myservlet.war:
build.xml
src/main/java/com/megacorp/projectx/HelloWorld.java
src/main/webapp/WEB-INF/web.xml
src/main/webapp/index.html
Where:
- WebApp/build.xml: This is the Apache ANT build script
- WebApp/src/main/java/com/megacorp/projectx/HelloWorld.java: The source code to generate WEB-INF/classes/com/megacorp/projectx/HelloWorld.class, the executable Java byte code
- WebApp/src/main/webapp/index.html: The default home page of the web application
File: WebApp/src/main/webapp/index.html
<html>
<head>
<title>My App</title>
</head>
<body>
<h2>My App</h2>
<a href="HelloWorld">Execute HelloWorld servlet</a>
</body>
</html>
File: WebApp/src/main/webapp/WEB-INF/web.xml
<?xml version="1.0" encoding="ISO-8859-1"?>
<web-app xmlns="http://xmlns.jcp.org/xml/ns/javaee"
  xmlns:xsi="http://www.w3.org/2001/XMLSchema-instance"
  xsi:schemaLocation="http://xmlns.jcp.org/xml/ns/javaee
                      http://xmlns.jcp.org/xml/ns/javaee/web-app_3_1.xsd"
  version="3.1"
  metadata-complete="true">

    <description>Servlet Example</description>
    <display-name>Servlet Example</display-name>

    <servlet>
        <servlet-name>HelloWorld</servlet-name>
        <servlet-class>com.megacorp.projectx.HelloWorld</servlet-class>
    </servlet>

    <servlet-mapping>
        <servlet-name>HelloWorld</servlet-name>
        <url-pattern>/HelloWorld</url-pattern>
    </servlet-mapping>

    <welcome-file-list>
        <welcome-file>index.html</welcome-file>
    </welcome-file-list>

</web-app>
Build and deply the web application:
- Apache ANT: ant install
see build.xml below. - Apache Maven: mvn install
see pom.xml below.
This will generate the Java WAR file myservlet.war which when deployed to the Apache TomCat webapp deployment directory $TOMCAT_HOME/webapp/ will be deployed as the Java web application http://localhost:8080/myservlet/
Note that the name of the WAR file becomes a distinguishing path in the URL. Select the hyperlink on the page to execute the servlet.
For more on building a Java Web Archive (WAR) file and examples see the Java WAR files tutorial.
Build and deply the web application: ant install
File: WebApp/build.xml
<?xml version="1.0" encoding="UTF-8"?>
<project name="Servlet" default="all" basedir=".">
    <description>Builds a Servlet.</description>
    <property name="home.dir" value="./"/>
    <property name="servlets.src.dir" location="${home.dir}/src/main/java"/>
    <property name="app.dir" value="${home.dir}/src/main/webapp"/>
    <property name="install.dir" value="/opt/apache-tomcat-9.0.30/webapps"/>
    <property name="lib.dir" value="/opt/apache-tomcat-9.0.30/lib"/>

    <!-- Classpath to find servlet and java packages -->
    <path id="classpath.base">
      <fileset dir="${lib.dir}">
        <include name="**/*.jar" />
      </fileset>
    </path>

    <target name="usage">
       <echo message="Available targets are:"/>
       <echo message="clean            - Remove war and class files."/>
       <echo message="war              - Generate war file to deploy to Tomcat."/>
       <echo message="install          - Copy war file to Tomcat war file deployment directory."/>
    </target>

    <target name="clean" description="Remove .class and .jar files">
       <delete includeEmptyDirs="true" failonerror="false">
          <fileset dir="${app.dir}/WEB-INF/classes">
             <include name="**/*.class"/>
          </fileset>
          <fileset dir="${home.dir}">
             <include name="myservlet.war"/>
          </fileset>
       </delete>
    </target>

    <target name="compile">
      <mkdir dir="${app.dir}/WEB-INF/classes"/>
      <javac srcdir="${servlets.src.dir}" destdir="${app.dir}/WEB-INF/classes" debug="true" includeAntRuntime="false">
          <classpath refid="classpath.base"/>
          <include name="**/*.java"/>
      </javac>
    </target>

    <target name="war" depends="compile">
       <war destfile="target/myservlet.war" webxml="${app.dir}/WEB-INF/web.xml">
          <fileset dir="${app.dir}">
             <include name="**/*.jsp"/>
             <include name="**/*.css"/>
             <include name="**/*.png"/>
             <include name="**/*.html"/>
             <include name="WEB-INF/classes/**/*.class"/>
          </fileset>
       </war>
    </target>

    <target name="install" depends="war" description="Deploy application as a WAR file">
       <copy todir="${install.dir}" preservelastmodified="true">
          <fileset dir="./target">
             <include name="*.war"/>
          </fileset>
       </copy>
    </target>

    <target name="all" depends="war" />

</project>
Build and install: mvn install
File: WebApp/pom.xml
<project xmlns="http://maven.apache.org/POM/4.0.0" xmlns:xsi="http://www.w3.org/2001/XMLSchema-instance"
  xsi:schemaLocation="http://maven.apache.org/POM/4.0.0 http://maven.apache.org/maven-v4_0_0.xsd">
  <modelVersion>4.0.0</modelVersion>
  <groupId>com.megacorp.projectx</groupId>
  <artifactId>ProjectX</artifactId>
  <packaging>war</packaging>
  <version>1.0-SNAPSHOT</version>
  <name>projectx</name>
  <url>http://www.megacorp.com</url>

  <properties>
    <project.build.sourceEncoding>UTF-8</project.build.sourceEncoding>
  </properties>

  <dependencies>
    <dependency>
      <groupId>javax.servlet</groupId>
      <artifactId>javax.servlet-api</artifactId>
      <version>3.1.0</version>
      <scope>provided</scope>
    </dependency>
  </dependencies>

  <build>
    <plugins>
      <plugin>
        <groupId>org.apache.maven.plugins</groupId>
        <artifactId>maven-war-plugin</artifactId>
        <version>3.2.3</version>
        <configuration>
          <warSourceDirectory>src/main/webapp</warSourceDirectory>
          <webappDirectory>/opt/apache-tomcat-9.0.30/webapps/myservlet/</webappDirectory>
        </configuration>
      </plugin>
      <plugin>
        <groupId>org.apache.maven.plugins</groupId>
        <artifactId>maven-compile-plugin</artifactId>
        <version>3.1</version>
        <configuration>
          <source>1.8</source>
          <target>1.8</target>
        </configuration>
      </plugin>
    </plugins>
  </build>
</project>
For more on Apache Maven, see the Yolinux Apache Maven tutorial.
Apache httpd is a fast and configurable web server whic can act as a proxy front-end on port 80 to Tomcat dynamic content. This section covers using Apache httpd as the primary web server but using Tomcat to process JSP and Servlets using AJP. Connect to Apache httpd 2.4 and 2.2 with mod_proxy_ajp (comes with the httpd Linux package installations:
- Red Hat/CentOS: /usr/lib64/httpd/modules/mod_proxy_ajp.so
- Ubuntu: /etc/apache2/mods-available/proxy_ajp.load
Use AJP: /opt/apache-tomcat-9.0.30/conf/server.xml or if installed as a package /etc/tomcat/server.xml
...
<Connector port="8009" protocol="AJP/1.3" redirectPort="8443" />
...
Proxy Tomcat through the Apache web server:
- Red Hat/CentOS: /etc/httpd/conf.d/tomcat-proxy.conf
# this line already exists by default
LoadModule proxy_ajp_module modules/mod_proxy_ajp.so

<Proxy *>
 Header set Access-Control-Allow-Origin "*"
 AddDefaultCharset Off
 Order deny,allow
 Allow from all
</Proxy>

# This proy's everything from "/" (don't do this if you want to serve static content from the root path of the web server along side dynamic content via /apps).
#ProxyPass / ajp://localhost:8009/
#ProxyPassReverse / ajp://localhost:8009/

# Proxy a non-root path. This proy's everything from "/apps".
ProxyPass /apps ajp://localhost:8009/apps
ProxyPassReverse /apps ajp://localhost:8009/apps
- Ubuntu:
Enable Apache proxy: a2enmod proxy_ajp
add to /etc/apache2/apache2.confProxyPass /apps ajp://localhost:8009/apps ProxyPassReverse /apps ajp://localhost:8009/apps
- Red Hat/CentOS: service httpd restart
- Ubuntu: systemctl restart apache2
This adds "/apps/" to the URL path.
Servlet WAR file URL path configuration file WEB-INF/web.xml does not change.
Run:
- Start Tomcat first: service tomcat start
- Start Apache: service httpd start
After Apache has started, one may perform a syntax check of the Apache configuration files with the following command:
[root prompt]# /usr/sbin/apachectl configtest
If sucessful it should return the statement: Syntax OK - Test with the URL:
- Test Tomcat WAR file: http://localhost/apps/myservlet/
- Test static page with Apache: http://localhost/
Log Files:
- Apache:
- /var/log/httpd/access_log
- /var/log/httpd/error_log
- Tomcat: /var/tomcat6/logs/...
We will cover connectivity to two databases:
Note: If connecting to Oracle, use the JDBC driver: oracle.jdbc.driver.OracleDriverInstall and configure a database. See: YoLinux Tutorial: PostgreSQL and Linux
JDBC and PostgreSQL JAR files: The "CLASSPATH" variable can set the Java runtime environment so that it will find the appropriate Java libraries (JAR files). Environment variables for Tomcat can be set in /etc/tomcat6/conf/tomcat6.conf. One may also set the CLASSPATH variable to include PostgreSQL JDBC JAR files. I did not set the CLASSPATH environment variable in the configuration file but instead employed the default path by performing the following steps:
List of PostgreSQL JDBC drivers:
[prompt]# rpm -ql postgresql-jdbc-7.1.3-2
/usr/share/pgsql/jdbc7.0-1.1.jar
/usr/share/pgsql/jdbc7.1-1.2.jar
Place JDBC JAR libraries in path where they can be found:
cp /usr/share/pgsql/jdbc7.1-1.2.jar /var/tomcat6/lib
Java Servlet run under Tomcat, accessing PostgreSQL using JDBC:
Java Servlet source file:
// File: ShowBedrock.java

/* A servlet to display the contents of the PostgreSQL Bedrock database */

import java.io.*;
import java.sql.*;
import java.text.*;
import java.util.*;
import javax.servlet.*;
import javax.servlet.http.*;

public class ShowBedrock extends HttpServlet
{
    public String getServletInfo()
    {
       return "Servlet connects to PostgreSQL database and displays result of a SELECT";
    }

    private Connection dbcon;  // Connection for scope of ShowBedrock

    // "init" sets up a database connection
    public void init(ServletConfig config) throws ServletException
    {
        String loginUser = "postgres";
        String loginPasswd = "supersecret";
        String loginUrl = "jdbc:postgresql://localhost/bedrock";

        // Load the PostgreSQL driver
        try
        {
              Class.forName("org.postgresql.Driver");
              dbcon = DriverManager.getConnection(loginUrl, loginUser, loginPasswd);
        }
        catch (ClassNotFoundException ex)
        {
               System.err.println("ClassNotFoundException: " + ex.getMessage());
               throw new ServletException("Class not found Error");
        }
        catch (SQLException ex)
        {
               System.err.println("SQLException: " + ex.getMessage());
        }
    }

    // Use http GET

    public void doGet(HttpServletRequest request, HttpServletResponse response)
        throws IOException, ServletException
    {
        response.setContentType("text/html");    // Response mime type

        // Output stream to STDOUT
        PrintWriter out = response.getWriter();

        out.println("<HTML><Head><Title>Bedrock</Title></Head>");
        out.println("<Body><H1>Bedrock</H1>");

        try
        {
                // Declare our statement
                Statement statement = dbcon.createStatement();

                String query = "SELECT name, dept, ";
                query +=       "       jobtitle ";
                query +=       "FROM   employee ";

                // Perform the query
                ResultSet rs = statement.executeQuery(query);

                out.println("<table border>");

                // Iterate through each row of rs
                while (rs.next())
                {
                   String m_name = rs.getString("name");
                   String m_dept = rs.getString("dept");
                   String m_jobtitle = rs.getString("jobtitle");
                   out.println("<tr>" +
                               "<td>" + m_name + "</td>" +
                               "<td>" + m_dept + "</td>" +
                               "<td>" + m_jobtitle + "</td>" +
                               "</tr>");
                }

                out.println("</table></body></html>");
                statement.close();
        }
        catch(Exception ex)
        {
                out.println("<HTML>" +
                            "<Head><Title>" +
                            "Bedrock: Error" +
                            "</Title></Head>\n<Body>" +
                            "<P>SQL error in doGet: " +
                            ex.getMessage() + "</P></Body></HTML>");
                return;
        }
        out.close();
    }
}
Notes:
- String loginUrl = "jdbc:postgresql://localhost/bedrock";
The format for this is jdbc:postgresql:host-name-of-server:port/database-name
Examples:- jdbc:postgresql:bedrock - bedrock is the PostgreSQL database name. See PostgreSQL tutorial.
- jdbc:postgresql://localhost/bedrock
- jdbc:postgresql://localhost:5432/bedrock - Default PostgreSQL standard port number is 5432
- public void doGet(...
Using http GET request. For http POST operations use doPost - String m_name = rs.getString("name");
One may also use database field names or field numbers. i.e.
String m_name = rs.getString(1);
String m_dept = rs.getString(2);
Set CLASSPATH environment variable:
export CLASSPATH=$CLASSPATH:/var/tomcat6/lib/jdbc7.1-1.2.jar

OR
export CLASSPATH=/usr/java/j2sdk1.4.0/lib/tools.jar:/usr/java/j2sdk1.4.0/jre/lib/rt.jar:/var/tomcat6/common/lib/servlet.jar:/var/tomcat6/lib/jdbc7.1-1.2.jar
Compile:
[prompt]# cd /var/tomcat6/webapps/examples/WEB-INF/classesPostgreSQL Configuration: /var/lib/pgsql/data/postgresql.conf
[prompt]# javac ShowBedrock.java
(OR /usr/java/j2sdk1.4.0/bin/javac ShowBedrock.java )
Set: tcpip_socket = true
This allows JDBC to connect to PostgreSQL.
Test:
- Tomcat only: http://localhost:8080/examples/servlet/ShowBedrock
- Apache Request: http://localhost/examples/servlet/ShowBedrock
Results:
Bedrock
| Fred Flinstone | Quarry Worker | Rock Digger |
| Wilma Flinstone | Finance | Analyst |
| Barney Rubble | Sales | Neighbor |
| Betty Rubble | IT | Neighbor |
JDBC/PostgreSQL Links:
Install and configure a database: YoLinux Tutorial: MySQL and Linux
Download JDBC MySQL JAR file:
- Install package mysql-connector-java-5.1.17-6.el6.noarch which includes /usr/share/java/mysql-connector-java.jar (sym linked to mysql-connector-java-5.1.17.jar)
Add JAR file to CLASSPATH. Add mysql-connector-java-5.1.17.jar to your WAR file.
"GRANT ALL PRIVILEGES ON bedrock to 'user@hostname' identified by 'password';
FLUSH PRIVILEGES
where hostname is localhost.localdomain (not localhost on default Red Hat installation)
Java Servlet run under Tomcat, accessing MySQL using JDBC:
Java Servlet source file: (Note that it does the same thing as the PostgrSQL example above but it is written with a different style.)
// File: ShowBedrock.java

/* A servlet to display the contents of the MySQL Bedrock database */

import java.io.*;
import java.net.*;
import java.sql.*;
import java.text.*;
import java.util.*;
import javax.servlet.*;
import javax.servlet.http.*;

public class ShowBedrock extends HttpServlet
{
    public String getServletInfo()
    {
       return "Servlet connects to MySQL database and displays result of a SELECT";
    }

    // Use http GET

    public void doGet(HttpServletRequest request, HttpServletResponse response)
        throws IOException, ServletException
    {
        String loginUser = "Dude1";
        String loginPasswd = "SuperSecret";
        String loginUrl = "jdbc:mysql://localhost:3306/bedrock";

        response.setContentType("text/html");    // Response mime type

        // Output stream to STDOUT
        PrintWriter out = response.getWriter();

        out.println("<HTML><HEAD><TITLE>Bedrock</TITLE></HEAD>");
        out.println("<BODY><H1>Bedrock</H1>");

        // Load the mm.MySQL driver
        try
           {
              Class.forName("org.gjt.mm.mysql.Driver");
              Connection dbcon = DriverManager.getConnection(loginUrl, loginUser, loginPasswd);
              // Declare our statement
              Statement statement = dbcon.createStatement();

              String query = "SELECT name, dept, ";
              query +=       "       jobtitle ";
              query +=       "FROM   employee ";

              // Perform the query
              ResultSet rs = statement.executeQuery(query);

              out.println("<TABLE border>");

              // Iterate through each row of rs
              while (rs.next())
              {
                  String m_name = rs.getString("name");
                  String m_dept = rs.getString("dept");
                  String m_jobtitle = rs.getString("jobtitle");
                  out.println("<tr>" +
                              "<td>" + m_name + "</td>" +
                              "<td>" + m_dept + "</td>" +
                              "<td>" + m_jobtitle + "</td>" +
                              "</tr>");
              }

              out.println("</TABLE>");

              rs.close();
              statement.close();
              dbcon.close();
            }
        catch (SQLException ex) {
              while (ex != null) {
                    System.out.println ("SQL Exception:  " + ex.getMessage ());
                    ex = ex.getNextException ();
                }  // end while
            }  // end catch SQLException

        catch(java.lang.Exception ex)
            {
                out.println("<HTML>" +
                            "<HEAD><TITLE>" +
                            "Bedrock: Error" +
                            "</TITLE></HEAD>\n<BODY>" +
                            "<P>SQL error in doGet: " +
                            ex.getMessage() + "</P></BODY></HTML>");
                return;
            }
         out.close();
    }
}
[prompt]# export CLASSPATH=/var/tomcat6/common/lib/mysql-connector-java-5.1.17.jar:$CLASSPATH
[prompt]# cd /var/tomcat6/webapps/examples/WEB-INF/classes
[prompt]# javac ShowBedrock.java

(ORexport CLASSPATH=/usr/java/latest/lib/tools.jar:/usr/java/latest/jre/lib/rt.jar:/var/tomcat6/common/lib/servlet.jar:/var/tomcat6/lib/mysql-connector-java-5.1.17.jar )
(OR /usr/java/j2sdk1.4.0/bin/javac ShowBedrock.java )
Test:
- Tomcat only: http://localhost:8080/examples/servlet/ShowBedrock
- Apache Request: http://localhost/examples/servlet/ShowBedrock
Notes:
- [Potential Pitfall]: The MySQL "user" table
will define users and their host. I made the mistake of using "localhost"
when the host name returned by the Unix command "hostname" was different.
When the servlet tried to connect to the database it was refused.
[prompt]$ hostname

superserver
[prompt]$ mysql -h localhost -u root -p
...
mysql> use mysql
mysql> select user,host from user;
+-------+------------+
| user  | host       |
+-------+------------+
| root  |            |
| Dude1 | localhost  |
+-------+------------+
mysql> update user set Host='superserver' where User='Dude1';
Query OK, 1 row affected (0.00 sec)
Rows matched: 1  Changed: 1  Warnings: 0
Links:
- JDBC MySQL driver "mm"
- Nusphere.com: Discussion and explanation of simple JDBC mm.MySQL servlet
- MySQL JDBC Examples
- MySQL Links - Lots of JDBC links as well.
- mm.MySQL guide
Java JDBC programs require the package: java.sql. Contained within this package are:
- Classes:
- Date
- DriverManager
- DriverPropertyInfo
- Time
- Timestamp
- Types
- Interfaces:
- CallableStatement
- Connection
- DatabaseMetaData
- Driver
- PreparedStatement
- ResultSet
- ResultMetaData
- Statement
JDBC Links:
Basic JSP elements:
- <jsp: ... %> : Define/execute Java statements.
Example:<jsp:usebean id="clock" scope="page" class="dates.JspCalendar" type="dates.JspCalendar"> Year: is <jsp:getProperty name="clock" property="year"/> <BR> Month: is <jsp:getProperty name="clock" property="month"/> </jsp:usebean> - <% ... %> : Execute Java statements. Nothing displayed.
Example: <% numguess.reset(); %> - <%= ... %> : Execute Java expression and place results here.
Example: Calendar:<%= table.getDate() %> - <%@ ... %> : Declare Java variable or method.
Example:<%@ page language="java" import="cal.*" %>
<jsp:useBean id="table" scope="session" class="cal.TableBean" />
The samples delivered with Tomcat show numerous JSP examples and the source code:
- Apache Project: Tomcat
- J2EE:
- JBoss.org - J2EE Java Enterprise application server - Want to define Java Enterprise Bean services which a servlet may invoke, use JBoss (or WebSphere).
- YoLinux: List of Java middleware servers
- YoLinux Tutorial: CGI programming with C++ and GNU GciCc - Perform the same functionality as this Java servlet tutorial but use CGI and C++.

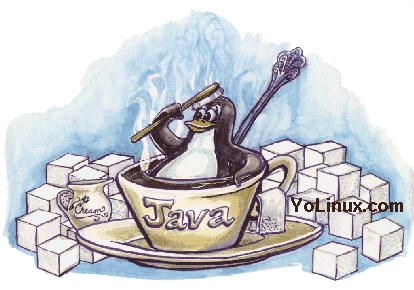 This tutorial covers the use of Apache Tomcat, Java and Linux

 Books:


